Welcome to Laura Bracken’s Jewelry Photography Workshop
On this page you will find the instructional videos for the three sections of this class. Also on this page are the downloadable PDF handout that includes quick tips and a supplies list.
BEFORE YOU START THE VIDEOS
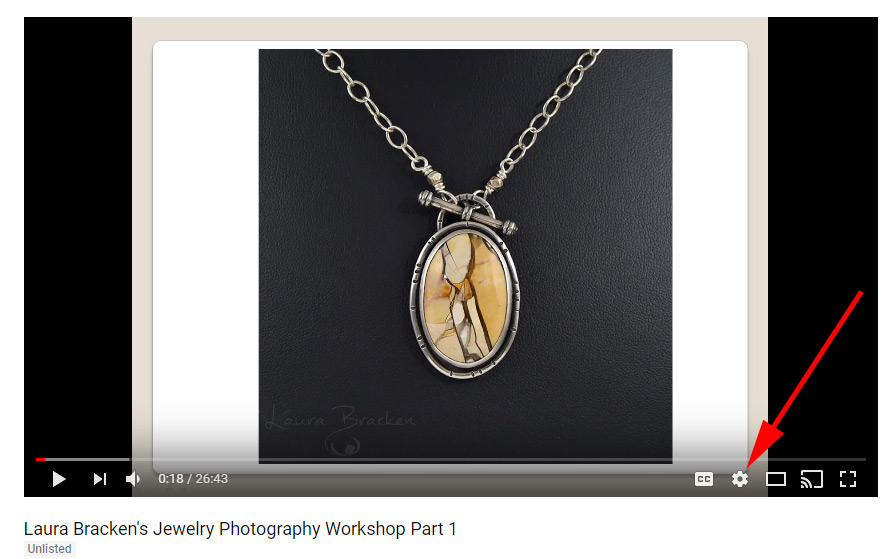
In order to optimize your experience, these videos are best viewed in high quality. Here are the instructions for making sure you’re watching in high quality (these are photos of my YouTube video; they are not the videos themselves).
When you are on the YouTube website and at one of my videos… click on the little gear icon in the lower right of the video in order to access the SETTINGS (you can pause the videos while you make these adjustments).
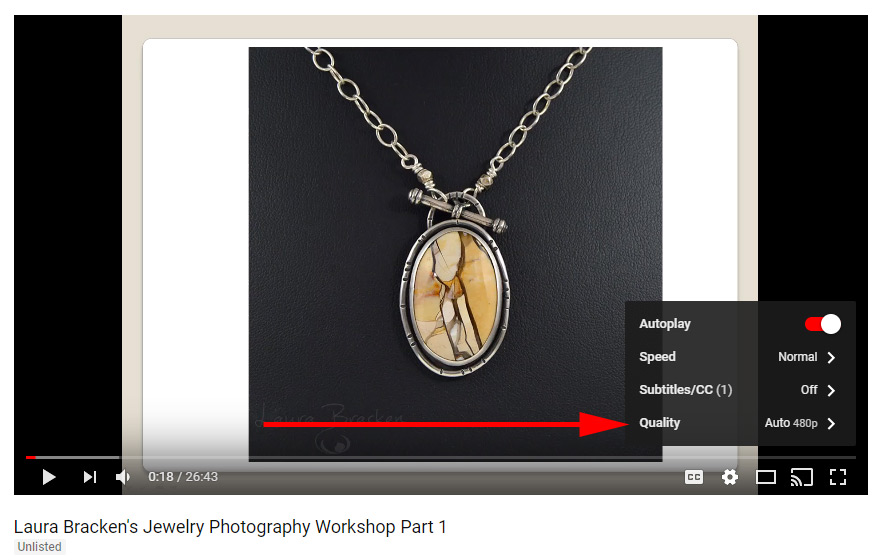
Then click on the “Quality” option of the pop-up.
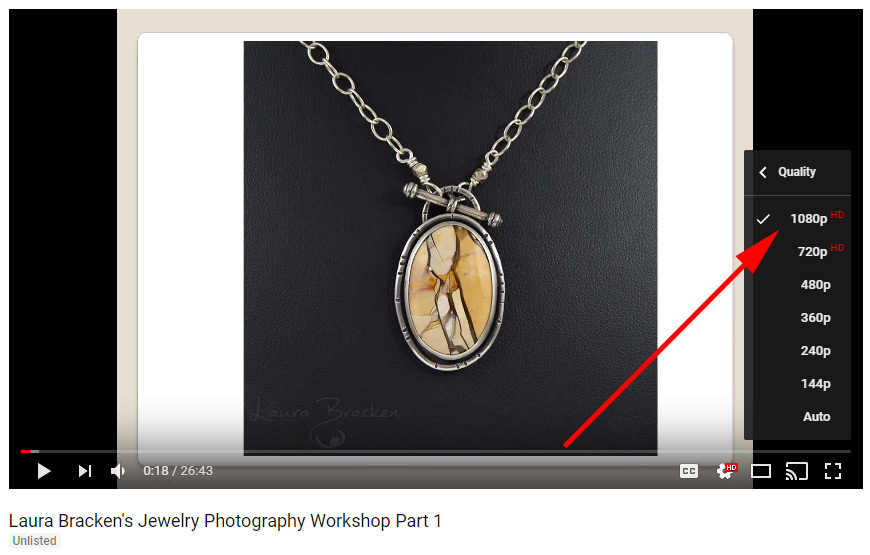
Then select 1080p which will give you the best picture. If you have trouble viewing the video at the highest quality, you can try reducing the quality.
If you want to watch the videos at full screen (rather than small size), click on this broken square icon.

This is my livelihood so I am asking that you do not share this information and/or links with anyone. Much appreciated.
THE VIDEOS
These videos are available for you to watch until March 17, 2018. Watch them as many times as you like and ask questions via the Facebook group page or by emailing me.
Click on the following hyperlinks to access the videos:
Part One – The Camera (26.43)
Part Two A – The Photography Set Up (28.56)
Part Two B – The Photography Set Up (continued) (32.58)
Part Three A – Photo Editing Introduction, Cropping, Sizing, and Saving (42.12)
Part Three B – Correcting Color (17.39)
Part Three C – Removing Unwanted Items (17.19)
Part Three D – More Selection Tools (16.30)
Part Three E – Sharpen and Blur (21.07)
Part Three F -- Adding Text or Logo (18.30)
Part Three G -- Adding a Border (16.10)
Part Three H -- Adjusting Lighting and Contrast, and Adding Shadows (15.57)
Part Three I -- Changing Background (18.32)
Part Four A GIMP Part 1: Resize, Crop, Color, Contrast, Selection (15.24)
Part Four B GIMP Part 2: Healing, Clone, More Selection Tools, Sharpen/Blur (19.54)
Part Four C GIMP Part 3: Layers, Text, Logo, Border, Shadows (20.41)
Part Five Elements 13 (28.38)
Adding a logo (Photoshop, Elements, and GIMP) (12.38)
Adding an Artificial Reflection (Photoshop) (10.26)
Adding an Artifical Reflection (GIMP) (9.45)
Photo-Editing Demo Videos (posted in Facebook group page)
Handouts
Click here for the Quick Tips Handout (latest version 3-12-18)
Click here for the handout on adding your logo to images
Click here for the instructions to add a reflection using GIMP
Click here for the Supplies Information
06-21-18